November 20, 2017 by Janet.
The
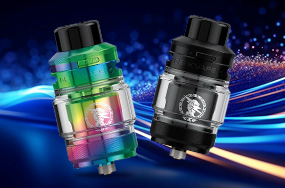
sub-ohm tank is one of the greatest advancements in the history of vaping. Sub-ohm tanks outperform the cartomizers and clearomizers of the past in every way. They're easier to fill. They generate bigger vapor clouds with purer, more accurate flavors. If a coil starts to become gunky, replacing it is a snap - just throw the old coil away and twist in a new one.
If you spend any time with other people who vape, though, you've seen how the other half lives. You've seen the spools of wire and the pouches of cotton. You've also seen the enormous vapor clouds. Maybe you've even felt a little jealous.
So, is a
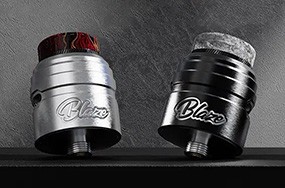
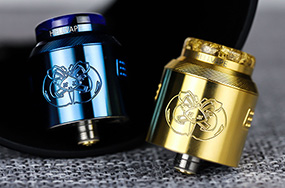
rebuildable atomizer for you? Building your own coils has plenty of benefits, but there's also a lot of effort involved. This article will make your decision an easier one.
Generate Bigger Vapor Clouds
Rebuildable atomizers often have large build decks and open airflow. A large build deck means that you can build large coils - and if everything else is equal, a coil with greater surface area generates more vapor. Combine a high surface area coil with a wide mouthpiece and an open intake vent, and you'll enjoy some seriously huge vapor clouds. If you equate a larger vapor cloud with a more satisfying vaping experience, there's no beating a rebuildable atomizer. People don't win cloud competitions with sub-ohm tanks.
Enjoy the Purest Flavor
Because rebuildable atomizers can generate so much vapor, they often have wide mouthpieces. A wide mouthpiece exposes a greater area of your palate to the vapor clouds that your mod generates. With the right coil design and airflow settings, switching to a rebuildable atomizer can instantly make all of your favorite
e-liquids taste more flavorful.
Great for Tinkerers
Building your own coils gives you room for experimentation. These are just a few of the ways in which you can change the characteristics of the coils you build:
- Changing the coil diameter
- Changing the number of coil wraps
- Changing the wire gauge
- Twisting or braiding wires together
- Buying pre-wrapped designer coils
- Experimenting with different wick materials
No sub-ohm tank has more than a handful of different coil types available. If you want to change the vaping experience drastically, you'll need to buy a new tank.
With a rebuildable atomizer, though, you never have to build exactly the same coil twice unless you want to. Rebuildable atomizers are perfect for people who love to tinker and experiment.
Easier on the Wallet
How much do you spend each month on coil heads for your sub-ohm tank? It's common for pre-built coil heads to cost around $2.00 each. If you don't vape heavily and don't use e-liquids with sweeteners, your coils may last a while. If you like sweet e-liquids, though, your coils may begin to develop gunk after just a day or two. Frequent coil head replacements can cause
vaping to become quite expensive.
Building your own atomizer coils, on the other hand, can cost as little as a few cents per coil build. You can buy 100 feet of wire - enough wire for months of new coils even if you rebuild your atomizer daily - for just a few dollars. If you replace the coil head in your sub-ohm tank more than once per week, switching to a rebuildable atomizer can save you hundreds of dollars each year.
Time Investment
No matter how experienced you become, building your own atomizer coil will never be as quick as replacing the coil head in a sub-ohm tank. The typical coil building process goes something like this:
- Cutting lengths of wire from a spool
- Wrapping the wire to create coils
- Installing the coils in your RBA build deck and trimming the excess wire
- Testing the resistance of the coil build
- Dry firing the coils and compressing them with tweezers
- Threading cotton through the coils
- Wetting the cotton and firing the coils again to check for hot spots
Depending on your skill level, it'll take you about 15-30 minutes to rebuild a dual-coil atomizer. It may not seem like much, but that's 15-30 minutes every few days that you could have spent doing something else. Unless you really enjoy tinkering, the time investment of building your own coils may eventually start to grate on you.
Potential Safety Benefits
There is still much about the safety aspect of vaping that we don't understand. It seems likely, though, that inhaling the byproducts of a gunky coil or burned wick isn't good for you. Do you ever leave a gunky or burned coil head in your sub-ohm tank longer than you should because it's your last coil and you haven't gotten around to ordering replacements?
When you build your own atomizer coils, there's no reason not to buy your supplies in bulk because wire and cotton are cheap. If you singe your wick, you won't have to risk your health - or the happiness of your taste buds - because you'll always have the supplies handy to build a new coil.
Potential Safety Drawbacks
When you use a sub-ohm tank, you can reasonably assume that the factory building your coils has at least basic safety standards in place. it's very unlikely that a pre-built coil head will have a short or a resistance that's dangerously low.
If you decide to build your own coils, you'll need to take responsibility for your own safety. Every time you rebuild the atomizer, you'll need to use a resistance tester to confirm the resistance of the coil build and check for a short. It's also wise to test the resistance of a coil build periodically as you use it.
If you use a
mechanical mod, checking the resistance of your coil builds becomes even more important. In most cases, a
box mod will warn you if your coil has a short. A mechanical mod has no safety features, though - and using a mechanical mod with a coil that has a short can potentially cause the battery to enter thermal runaway and vent. If you aren't willing to check the resistance of every coil you build,
a sub-ohm tank is probably the best vaping attachment for you.


